background

Sunday, 1 December 2013

how to use clipping mask on a gif in Photoshop CS6 extended...

hello all
Gunjan is back ! after a long time with a tutorial
so this is about adding clipping mask on a GIF
it's look something like this - 

so 1st step -  make a GIF which u wish to add clipping mask on, add effects and then save it and then ope  it again (yeah this way u won't find the effects, texture and adjustments layers as it hides / merges them as one but just the gif and i believe it's good if u have less layer's in layer box it becomes easier ;) )


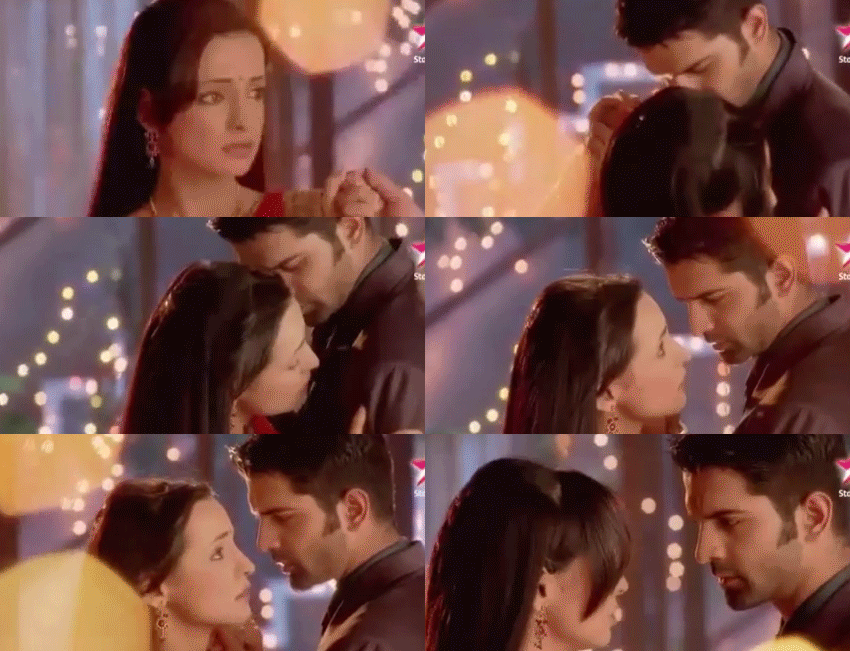
^^ here is the one i am gonna use and it has total of 60 frames= 60 layers 
** make sure ur GIF doesn't have too many frames it will only lead to problems)

step 2-  select the last (top) layer in layer box i.e. for me layer 60 and then below the layer box u will find a folder icon click on it to open a group.
 < {group icon below layer box}

 << clicking at it ur layer box will look something like this :)

now select all layers in layer box except the group one - {click on 1st/last layer + shift and still pressing ship bring cursor to last/1st layer and click on it}

 < {here all my gif's layer's from 1-60 get selected !}

click on the selected layers {any one} and drag it to group and release them there on it {all layer's are selected so all of them move together}
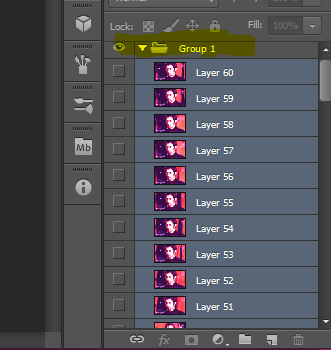
 {the highlighted part show's the difference if u notice the layer's have shifed slightly towards right which indicates that now they are under the group}

click on the arrow and the group to minimize it .


now it's time to work on timeline
ur timeline currently looks like this -


u need to convert it into video timeline mode.
for that -  clikc on the side arrow on timeline (where select frames/copy frames option is present) in the last somewhere u'll find an option - set to video timeline click on it
your will now look like this -

now select the custom shape tool in toolbox

 < (u may find any other icon like rectange/circle/line/hexagon to change it to custom took u need to right click that icon and select custom shape tool)

now u need to add a new layer (u can do it using new layer icon below layer box)- 

*u can even use any other shape other than custom like eclipse/rectange/hexagon

on the new layer u made a shape using shape took


** it doesn't matter what shade ur shape is as later it won't be visible

u can select the custom shape u wanna use from here -
** u can even download new custom shapes from deviantart.com or anywhere else.

to add stroke (border) to custom shape double click the custom shape layer and click on stroke select color as u wish and click okay)

here i added some effect to my custom shape so now it looks like this


ur timeline will looks something like this right now


now right click on group in layer box and select > Convert to Smart object
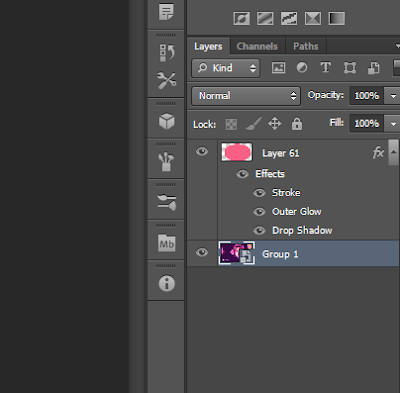
now ur layer box will looks something like this while image will look like before only


now u drag ur group one layer above the shape layer 

 ^^here's how ur gif and layer box would look then

now right click the group 1 layer (above layer i.e. of ur gif)
and click on create clipping mask


dada ! ur done with it ! 
play it and check if it works

**okay i realized something the group layer extends far here and shape layer ends so soon so timing problem comes

see here -  

if this happens all u need to do is extend the ending of layer 61 (shape layer) till the end of ur group one layer in timeline

like this -


now play and check again !
so i guess everything is perfect now
so go to file > save for web> ** when the window appers u'll notice instead of forever once will be written there so just change it to forever

click on ok and ur done with it ! 

** u may also increase canvas size after saving it and add some text like this


** add text after making and saving ur gif open it again and then add text (at that time the main type of timeline will be there so it will make adding text easy otherwise u may face some problem 


hope u understood it
if u face any problem plz feel free to ask me by commenting i'll try my best to help :)


Monday, 2 September 2013

How to make a GIF from video in Photoshop

hey me again with a tutorial on making a gif from video in photoshop :)


so firstly open your PS :P 
now go to file > Import >  Video Frames to Layers..

now a pop up window opens with your my pictures / videos or downloads whatever it is but you need to go to videos (Libraries > video)
click on the video you want to make a GIF of 

like i chose Arnav & Khushi Love scene 120 so i will make a GIF from this video on click on Open or simply press enter

Now the window you get will be like this 

you need to chose Select Range Only and not From begining to End !

and if the size of the part you want in your GIF is too much long then you need to click on Limit to every and whatever the frame no. is 

now select the part you want as GIF


i click on OK 

but i get this window (it only appers if the no. of frames created are too much in size)

so i will click on Limit to every {in the box i chose 2} frame and then click on Continue

i get 204 frames u may get less or more 

^^ here in the timeline u can see how many frames u have

 layers window will show the same amount of layers as the no. of frames in timeline


now to get a proper size and shape for my GIF i need to crop it !


 ^^ this is the crop tool in PS

using it crop your GIF to the shape you want it in

after selecting the area you want to crop right click and then click on crop 


^^this is my final GIF to know if it looks good i will use the play button and see how it will play 

^^ (red line circle) is the play button :P

and keep in mind that forever is selected (highlighted part)

now to to file > Save for web > the in the pop up window click on save but do check the loop is forever and color is 256 > my pictures (or wherever you wish to save your GIF) > type the name of your gif (for example khushi and add  .gif  (not necessay but i do that !) so the name will be khushi.gif > save 

my result :D


hope you got to do it now ;)
-Gunjan


Wednesday, 28 August 2013

How to add texture to a still image

this tutorial tells about how to add a normal texture to a still image (my simple way of doing it though there r many other ways)
which looks like this

and the texture i used here is 


u can use some other texture and if u donno how to find then u can either search Devianart.com 

and then open PS and then the pic u want to add texture to


like i opened this one this time so i will add the rose texture in this but first i will have to remove that extra border so i will use the crop option and remove it :)

 << crop option


^^ so now the area i want as pic in which i add text is selected with the crop tool (leaving the part with text and border)
right click on the selected area and then in the window that comes up click "CROP"
and so ur image will be cropped 

*this step will only be used if there is extra border or text that u don't want it ur pic other wise u don't need to follow it*

after cropping if u want ur pic to be of a larger / smaller size go to image > Image size and then change the size of ur image ( i am not going to follow this step as i don't need it)


^^ now that i have cropped it looks like this (with crop tool still selected)

now go to layer > new > layer


^^ i am naming this new layer as "Layer"

so in the layer window u find a new layer added

Now  u open ur texture in a new window of PS


^^ see it gets opened in a new tab

now u select the stamp tool 
 << this (red) is stamp tool

now u go to ur texture press left click of mouse along with Alt (together)

now u move back to the pic u want to add texture in and start applying the stamp tool there like this

make sure that the mode is normal and opacity is 100%

now i apply this to the whole image
at the end it will look like this >.


and the layer's window like this

and then u look at the mood of the texture added new layer


here where it says "Normal" click on it and change it to something else (best try using trial and error method :D) mostly use lighten/overlay/screen


i have changed it to lighten so now my texture layer and pic looks like this

now i go to move pixels tool 

and move the texture layer
so now my pic looks like this

and layer's window


so now ur texture is added to ur image u can leave it here and save ur image or like me add the same texture again with different position by following these steps >

Go to layer > new > layer
follow the same procedure u did before (stamp tool one)
i have named my this new layer as layer a
so my pic now again looks like this


and  layer's window like this

like before i move this layer to the place i want
i have placed it here

and then i again use the lighten option
it looks like this but then i don't like it's position so i move it

now u can move it wherever u want
i have placed it here
so my final product will be like this and u can add some text also if u wish to but i won't and so just save it ! 
and remember to save it as JPEG
and not PSD as it asks to click ok on the options in windows that pop up after that

hope u got to do it now :)

- Gunjan